Welcome to the Ottawa Refuge Kids Corner Online!
Explore crafts, environmental education pieces, and ideas for rainy day play.
Explore crafts, environmental education pieces, and ideas for rainy day play.
|
Crafts
Downloadable templates and craft ideas. Toilet Paper Tube Crafts
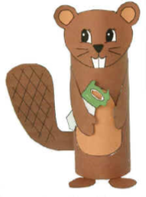
Beaver TP Tube Craft
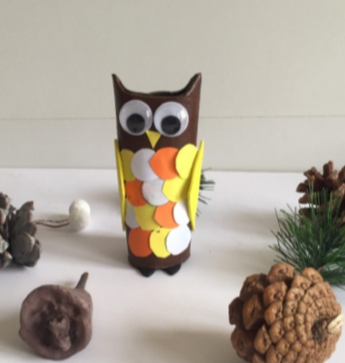
Owl TP Tube Craft
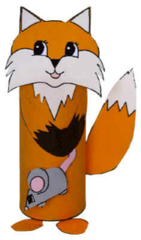
Fox TP Tube Craft

Scientific Method & More!
Learn more about the scientific method & access more fun experiments on fun.com (Submitted by Laura & Janet!) Crosswords and Word Search
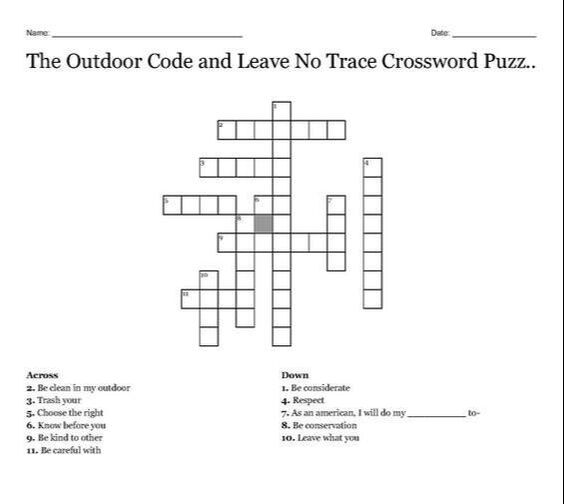
Leave No Trace Crossword Puzzle
Leave No Trace Word Search
Wetlands Word Search
Birds Word Search
Ecology Crossword Puzzle
|
Projects
Interesting projects you can do from home. Reusing Plastic Bottles: Crafts and Projects
Upcycling or repurposing items to use them in new ways has many benefits. Not only are you minimizing the amount of waste that you produce, but you can often save money when you use what you already have for new purposes. Instead of buying an item new, you can use your imagination to make the item out of things you already have. Follow the link below for crafts and projects made with plastic bottles. (Submitted by Jack!) Creative Ways to Reuse Plastic, Rubber, and Other Recyclables
Check out these five ways to recycle every day items. 1 - Make a DIY Plastic Bottle Planter 2 - Upcycle a Bottle into a Charging Dock 3 - Turn Plastic Bottles into a Trash Can 4 - Plastic Bottle Cap Lamp 5 - Create a Vertical Garden with Soda Bottles And click the button for more crafts & science projects with plastic bottles - including how to make a model lung and capture a tornado in a bottle! (submitted by Katie!) Make your own Microscope
Make a simple microscope using water and take a closer look at the world around you.The lens you create with water works like a microscope or magnifying glass, allowing you to see objects in much greater detail than if you were just looking with the naked eye. What you'll need:
Pioneers of early microscopes originally used tiny glass globes filled with water to magnify objects, this is similar to what you are doing in this experiment. The water droplet forms the shape of a convex lens, which refracts the light and converges it at the point where you see the image clearly. It was later that the method of grinding glass to make lenses was perfected. Modern microscopes have many lenses in them and allow us to see extremely small objects. Rain Gauge Project
How much rain is really falling when you watch a heavy shower through the window of your home? How about on other days when it’s just a light shower? Find out by making your own rain gauge, recording the results and studying your findings. What you'll need:
Rain falls into the top of the gauge and collects at the bottom, where it can be easily measured. Try comparing the amount of rain to the length of time the shower lasted, was it a short and heavy rain shower or a long and light one? If you want to get serious you can graph the rainfall over weeks or even months, this is especially interesting if the place you live experiences varying seasons where sometimes it is very dry and other times it is very wet. Combine your results with wind speed, wind direction and air pressure for a full weather report Wind Speed Challenge
Harness the power of wind with some weather based projects that will help you understand wind speed and how it changes from place to place and day to day. Put your problem solving skills to the test with these fun challenges. Anemometer An anemometer will help show you how fast the wind is going by spinning cups around. The faster the wind is moving the faster the cups will spin. What you'll need:
Your challenge is to design something that can measure the wind speed. Create an anemometer that features free spinning cups that spin faster as the wind increases. The wind should blow into the cups pushing them away. The faster the wind the more force it has to push the cups and the faster they spin. You can measure the wind strength by comparing how many times the anemometer spins around every 10 seconds. Does it vary from place to place and day to day? |
Games
Follow these links for fun games to try! 
Food Chains Game
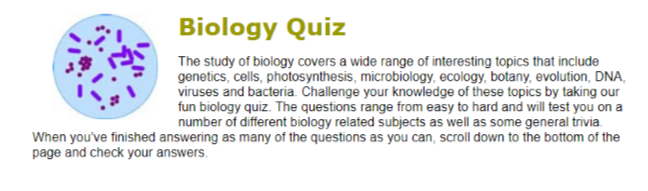
Biology Quiz
Science Experiments
Make a Tornado in a Bottle
Learn how to make a tornado in a bottle with this fun science experiment for kids. Using easy to find items such as dish washing liquid, water, glitter and a bottle you can make your own mini tornado that’s a lot safer than one you might see on the weather channel. Follow the instructions and enjoy the cool water vortex you create! What you'll need:
Spinning the bottle in a circular motion creates a water vortex that looks like a mini tornado. The water is rapidly spinning around the center of the vortex due to centripetal force (an inward force directing an object or fluid such as water towards the center of its circular path). Vortexes found in nature include tornadoes, hurricanes and waterspouts (a tornado that forms over water). Make an Easy Lava Lamp
Learn how to make an easy lava lamp with this fun science experiment for kids. Use simple household items such as vegetable oil, food coloring, Alka-Seltzer and a bottle to create chemical reactions and funky balls of color that move around like a real lava lamp. What you'll need:
If you've tried our oil and water experiment you'll know that the two don't mix very well. The oil and water you added to the bottle separate from each other, with oil on top because it has a lower density than water. The food coloring falls through the oil and mixes with the water at the bottom. The piece of Alka-Seltzer tablet you drop in after releases small bubbles of carbon dioxide gas that rise to the top and take some of the colored water along for the ride. The gas escapes when it reaches the top and the colored water falls back down. The reason Alka-Seltzer fizzes in such a way is because it contains citric acid and baking soda (sodium bicarbonate), the two react with water to form sodium citrate and carbon dioxide gas (those are the bubbles that carry the colored water to the top of the bottle). Adding more Alka-Seltzer to the bottle keeps the reaction going so you can enjoy your funky lava lamp for longer. If you want to show someone later you can simply screw on a bottle cap and add more Alka-Seltzer when you need to. When you've finished all your Alka-Seltzer, you can take the experiment a step further by tightly screwing on a bottle cap and tipping the bottle back and forth, what happens then? |
Extended Learning Opportunities
Junior Duck Stamp
|
|
|
Birds
|
|
|
Insects
|
|
|
|
|
|
Reptiles and Amphibians
|
|
|
Mussles
Mammals
|
|
|
Fish
Winter Critters
|
|
|
Great Lakes
|
|
|
Swamps and Wetlands
|
|
|
Natural Resources Career Exploration
|
|
|